Hitai-Ate
To start things off this year I decided to do something rather simplistic (though I doubt I could ever do something really complicated) to refresh my memory on how to do some of the commands. I had other ideas, but I decided to do them later in the year. I feel that I can do better, but it has really helped me re-learn the commands, which was this projects main purpose.
Cinch Connector
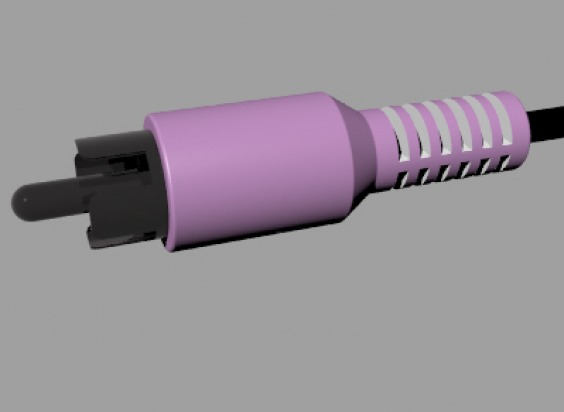
The cinch connector was easier than I thought it would be since last year I hated tutorials because I found them to be hard and confusing. But this year since my knowledge in rhino is augmented I found that I've had few problems with this.
Winged-Ring
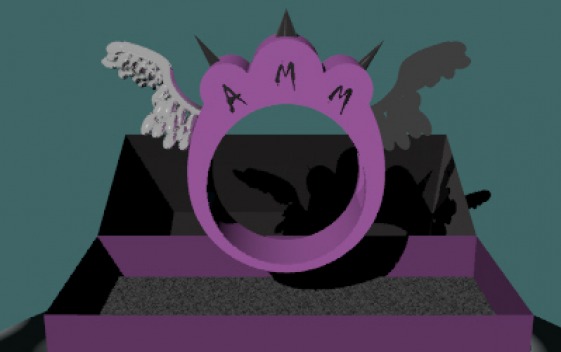
I had three ideas for this project. One was a sun ring, the other was a moon ring that would go with it, and the last idea was a winged ring. I chose to do the sun and moon ring since they would be more appealing to other people while the wing one was more personal, but I ended up doing the wing ring because my file for the others got corrupt. I guess I need to improve my bongo skills since everything seems to go wrong when I bongo something, or maybe bongo just hates me?
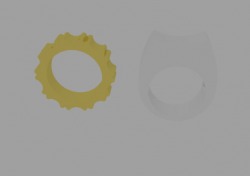
This was the basic designs for my other two rings. I don't have any more recent pictures since the file got corruput.
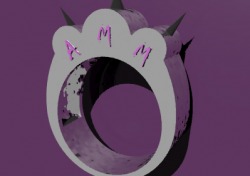
This was the first design for my ring, the second time around. As you can tell from my final version I changed the color and added wings.
Self-Evaluation
I need to improve upon the layout for my website since it's kind of hard to see the steps I used for the engineering design process. I also need to learn some more rhino commands since there are a lot of things I want to make, but don't exactly know the how part.
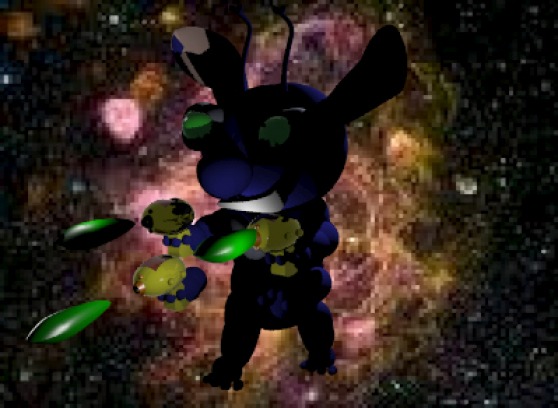
Project: GUARDIAN
For my next project I have to design a robot, and then animate it so that it preforms a task. I want to create a robot that serves both a entertaining and yet a threatening purpose. I know that it will have a dog like shape, of course. I will call my robot a 'guardian' because its purpose is to guard its owner while, at the same time, be a walking mass of technolgical entertainment. My design sort of reminds me of a Transformer or one of Sasori's puppets.
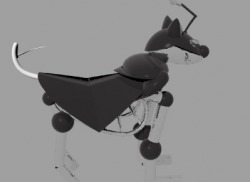
My First Design
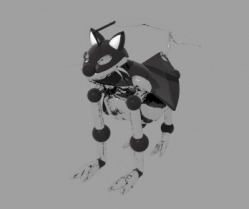
My Second Design
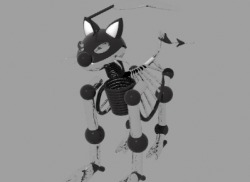
Now that I had a solid task that I wanted my robbot to do its outerly appearance became easier for me to image. As you can see my robbot went under some major changes since my first design. I changed the design for everything. I changed the shape of the eyes, added pointy ears, and just made the body more robbotic like.
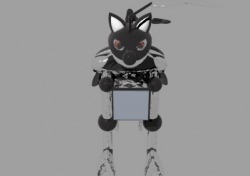
My Third Design
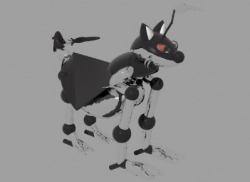
I recolored the eyes, and made them red with a sort of lense in them so that it can see, and it also made it look more evil, which is a plus. I also added some armor that will make my robbot more durable, and now it's not just a basic outline type thing. I also added rockets on its feet so that it can fly (didn't have time to add that into my animation).
The Best Is The Last
I chose the third design because for one it looks the coolest. The other reason is that I wanted to challenge myself by doing something more difficult. I will certainly have my hands full when I have to bongo this thing (and yes I did). The last reason is that the design itself seems to be the best for the task I have set.
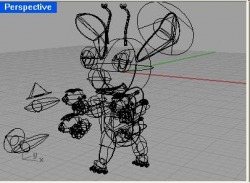
Day 1
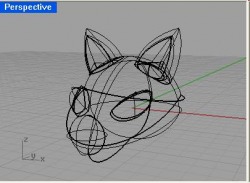
I started working on the head. I made the ears, nose, mouth, and added some basic head armor for it. I also started working on the eyes by making a type of glass type thing shielding them, but I still haven't made the lense that will allow my robbot to see. I was surprisingly very happy with how this turned out.
Day 2
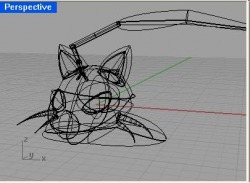
For the most part I have finished the head of my robbot, so I started working on other things that will improve its weaponry and defensive power. I made a scythe / sickle type thing that protrudes from his head, and started working on its armor; I started with the shoulder blade armor. The scythe can also rotate 360 degrees, which allows it to kill people swiftly at close range. I didn't have time to add this to my animation.
Day 3
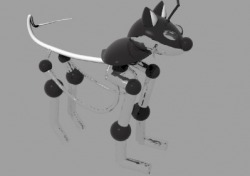
I started making the frame for its body, which includes the spine, tail, and part of its torso. I also added legs and a basic shape for its paws, and these orb-like things that connect each part.
Day 4
Today I started to add armor, which included metal plating that protects its body, and added more armor to its front legs.
Day 5
Today I fixed its torso armor, so I had to make its actually torso fisrt. After that I started making its paws, and elongated its tail. I also made its jaw retractable for when I start animating.
Day 6

I added armor to its tail, added rockets to its feet, and made its claws retractable so it can unleashe the hidden needles that are in them.
Day 7
I worked on adding a more tame side to my robot. It was designed to both protect and entertain its owner. So I added a tv screem, which has a built in video gameing system and mp3 player that allows the owner to listen to music, play video games, and watch tv / dvds; the ears are the speakers.
Day 8
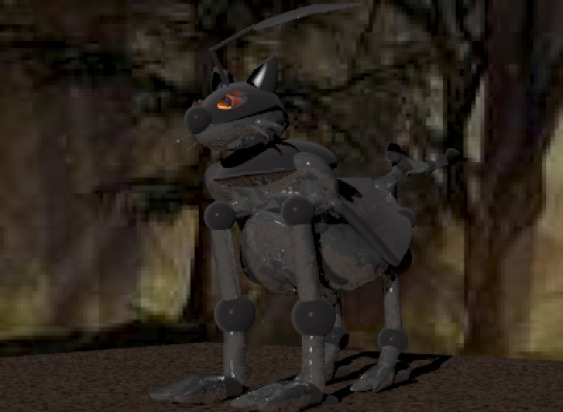
It took me a while to figure out how to add the background, but I eventually figured it out. It makes it look cool, doesn't it? I also started animation...
Self-Evaluation
I think the design itself is good, but I think I could have done better with the animation. I wanted to add more to it, but I didn't really have the time, or the patience since the file kept getting corrupt. I also think I need to improve my bongo skills since it took me like a whole day to to move one thing, and because of that my project ended up being late.
What I Learned
I learned how to use bongo better (but I still suck at it). I have learned how to somewhat change the pivit point, which makes rotating a lot easier. I also learned how to hide and show things in my animations like the flames. I also have learned that I should save after I create each key frame since my files like getting corrupt, and to have a copy un-bongo'd and bongo'd on my flash drive.
A Different Stitch
For my student directed project I decided to draw the Stitch from Lilo and Stitch instead of my Stitch. I've learned how to use lighting in my rhino drawing to accent certain parts or to dim the lighting in some other areas. I've also learned that it's a lot harder to draw 2d things in 3d. I feel like I could have done better since there seems to be something off in the proportions or something, but, alas, I don't have time to spend a couple more of my classes perfecting this since I need to put my time into my next project, so ja ne.
Kyuubi's Prison, Naruto's Subconscious
Instead of doing the fire drill project I decided to do something else that used the same commmand. I based my project off of the anime / manga Naruto. Naruto is in his subconscious and is making his way towards the nine tailed fox - Kyuubi. When I animate I'm going to attempt to make it look like a video game.
Self Evaluation
I think I did pretty good: I like the concept I chose, the design itself is pretty good, though, I'd like to have added more detail to it, but I didn't have all the time in the world to do so, and for once I sort of like the animation I did - now - that's an improvement for me, I would think! Though I still didn't have enough time to do all that I wanted to do for my second animation - I only had time to do a small part of what I wanted to do, but at least I finished what I needed to get done.
What I Learned
I learned a new command during this rhino assignment. I learned how to do the walkthrough command, or whatever it's truely called. I also learned how to animate better since I animated other stuff other then using the walkthrough command on a curve. I incorporated the parent / child command in my animation, which I've never done before. I also used the hide and show command for the lettering and the fox as it disipates. It took me a while to figure out how to get the hands and the HP / CH bar to follow the curve / camera, but I somewhat got it by using the parent / child command.
Dinosaur

My next project was to use an online tutorial to make something in rhino. I chose to make a dinosaur. My work isn't as good as the original, but I added some of my own personal touches to compensate. For example I added the horns at the top of the head, and the spikes descending from the the neck and going down to the tail. The link for the tutorial is here: http://www.3drender.com/rhino/dinohtml/index.htm
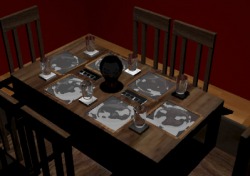
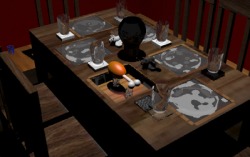
Universal Design Project
Universal Design: relatively new paradigm that emerged from barrier-free or accessible design and assistive technology.
Idea: A table that can keep your food / drinks at a constant temperature.
Problem: Doesn't it suck when your food / drink gets too cold or too warm too quickly?
Example: You get up to do something for a couple of minutes and when you return your nice warm cup of coffee is now nukewarm? Your food gets cold by the time you finish it?
Solution: The table will have built in control pad that can set the temperature of one's food. When you press the on button the coils under the plate will heat or cool depending on what you set the temperature to be.
MY First Design

The table has knobs on the sides that can be turned to chage the temperature of your food, just like the knobs on your stove except they don't go up that high, and have lower temps too. The only problem is they can easily be pushed or turned by accident, which will become annoying fairly fast.
My Second Design
I made a keypad type thing in the center of the table. There you can type in what your eating and the pad will set your plate to the right temp, or you could type in a custom temp as well. The only problem is that it is hard to reach in the center of the table, and people could get burned trying to reach for it when they want to change the temp or turn it off.
My Third Design
Instead of having one control pad in the center of the table their will be one set up to each heating and cooling system, so it will be easier to reach.
Reflection / Feedback Reflection
This project was one of the more harder ones since I had a very hard time thinking of an idea. There are still some flaws in the final design as Stitch-sama points out.
Self Evalulation
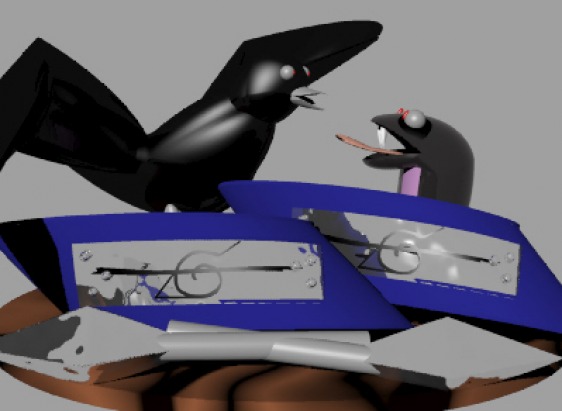
Not one of my bests or favorites. I mean the room itself was coming out pretty good, but I think I spent too much time on it, and started to run out of time for the animation, which was rushed and completed in a class. Plus I had to rush it even more since Rhino kept crashing evertime I tried to move or rotate something. So the idea I like even though it has some flaws, the drawing is good except for anything that had to do with the animation, which as I said before was very rushed. The best thing about the project is the adorably evil Stitch salt and pepper shakers. ;)
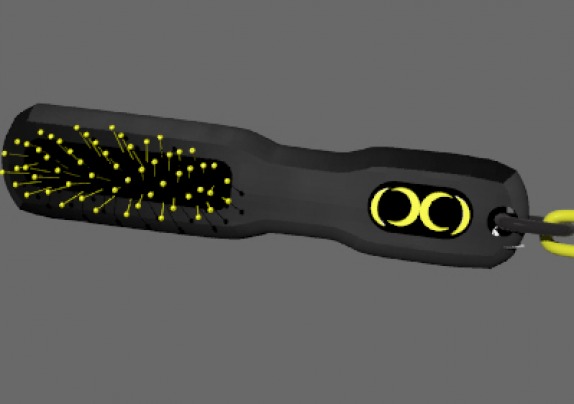
Hairbrush
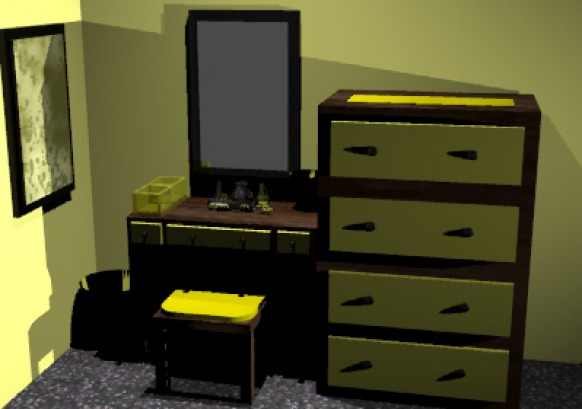
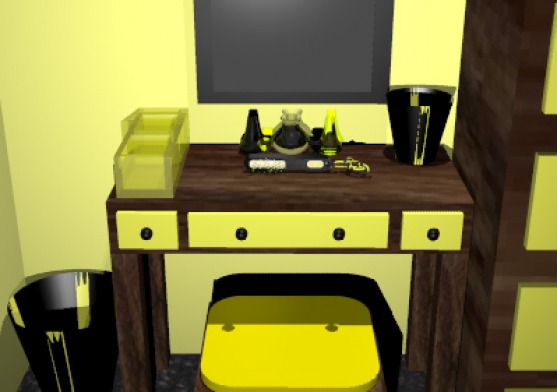
Room